05 3 / 2019
Wedding Dress Hacks

Hello friends! It has been a while.
I haven’t been in the mood to craft, create, or crochet lately and I apologize. 2018 was a very hard year for me. And I promise to do a full update post soon.
As some of you may know…I got married in 2018 (one of the only highlights of that year!), and just last week my sister got engaged. She has been asking me about some tips and ideas to save money, and how I planned my wedding. So I thought others might have the same questions as well. And let’s be honest, who doesn’t want to save money? Especially on such an expensive day!
This is the first post of many in a series I intended to do for “Wedding Hacks” to save money! First off is wedding dresses! Other topics I hope to address are accessories, makeup, and flowers. Maybe more ideas will come to me, or you guys will have suggestions!
Let me start off with dress shopping! Oh goodness! This was so much fun, and there are so many easy and affordable ways to have a beautiful wedding dress that doesn’t hurt your bank account!
I had 2 wedding dresses. I wore a white one for the ceremony. And a modern traditional Chinese dress for my reception.
I actually changed back into my white dress halfway through dancing because my Chinese dress was just so heavy with the beading and embroidery.
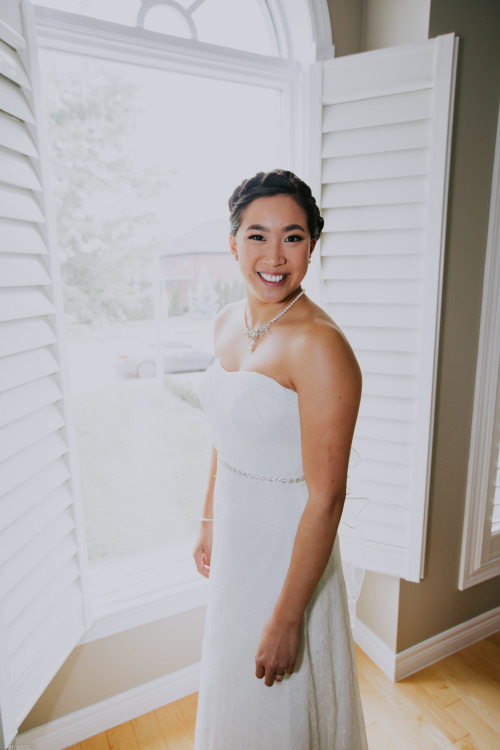
Let’s start with my white dress. It is a strapless A-line lace gown. And it’s a BRIDESMAIDS dress! That’s right! I ordered a bridesmaids dress in white. Did you even know they make bridesmaids dresses in white?
It was beautiful! The lace detailing was exactly what I was looking for. I was also looking for a dress that wasn’t so heavy. A lot of gowns that I had tried on were very heavy and made me sweaty just walking around the boutique! I wanted something lighter and simpler for my dress.
So I paid $300 for this dress! Such a smaller price tag then similar dresses I was looking at in boutiques in my city. This dress can be found online HERE, but a wedding boutique in my city ordered it for me.
There are LOTS of other online websites that sell bridesmaids dresses. The websites I have been looking at for my sisters wedding dress are Boutique 1861 and For Him and Her.
I have ordered off of Boutique 1861 before, not for bridal dresses, but for formal dresses, and their shipping and returns is super easy. And their dresses are beautiful as well.
My sister has ordered off of For Him and Her for a bridesmaids dress for a wedding that she was standing in. She liked their shipping and how you needed to put in your exact measurements to make sure they are sending you the correct size.
My only warning for ordering a bridesmaids dress instead of an actual bridal dress would be the range of styles. If you are looking for a simple gown with tulle, chiffon, lace, or a mixture of those, a bridesmaids dress will be perfect. But if you want a ball gown with a big skirt (like a Cinderella dress) this probably is not the route for you!
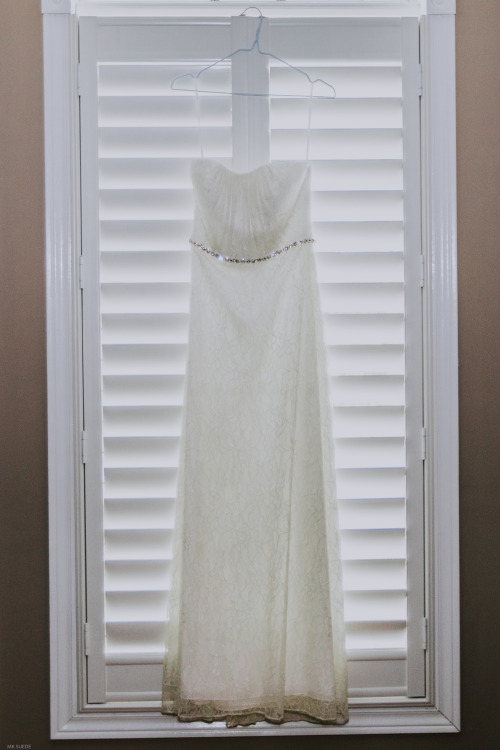
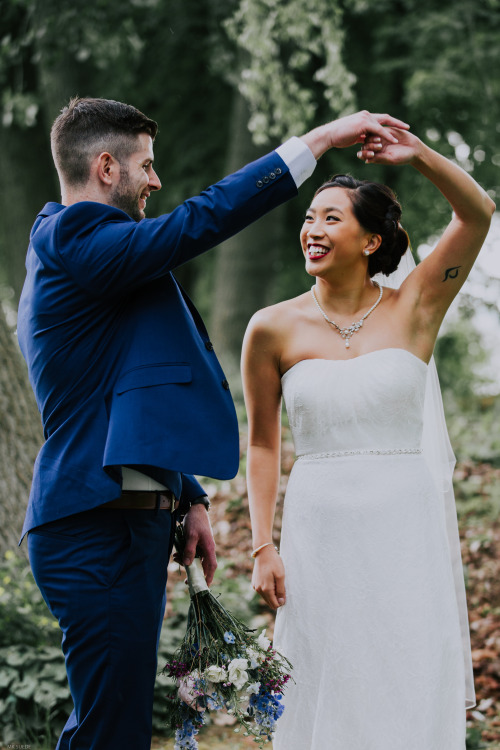
Since my dress was simple, I felt like it needed some sparkles, so Etsy was the answer! Find the exact belt listing HERE. The shops name is Bridal Gifts Design, but I can’t seem to find the shops main page. But there are plenty of options on Etsy for similar belts like mine. And do not be afraid to ask for a custom order if you like the shops work, but can’t find exactly what you are looking for, that’s what I did.

I found that a lot of wedding dress belts only had a few rhinestones at the front, then was tied onto the dress with a coloured ribbon. I did not like the ribbon look on me/my dress so reached out to the shop to ask for a custom order of a belt of just rhinestones! Fair warning though, custom orders can be more expensive, but I believe it’s worth the price. Not to mention you’re supporting other crafters! :)
So in total my white dress was $300, the belt was around $100. And luckily enough, I didn’t need alterations! Phew, what a money saver. So my white dress cost me around $400. This does not include the veil!
But $400 is a pretty good steal!

Let’s move onto my red dress!
It was my dad who said he did not have an opinion when it came to what colour dress I wore (either traditional or white), but he said he would love to see me in the traditional colours. Which is why I made sure I had one!
Chinese dresses can get EXPENSIVE! Especially where you choose to shop! But there are a lot of Chinese wholesale sites online. But REMEMBER it is in Chinese sizing which is typically 1-2 sizes smaller than Canadian/American sizing. So look at reviews, measure yourself, and if you’re doubtful, order a size up. A good tailor can make the dress smaller, but can’t make the same fabric appear out of thin air to make it bigger!

This is a traditional modern Chinese bridal gown. It has the same shape, with the high neck, colour, and embroidery on it. But is also modern with the mermaid fit along with a train. Find my exact dress HERE. I paid around $100. Find the main wholesale website HERE. I did not use any other website, nor have I researched any other wholesale websites. But I can say from my experience it was amazing! My dress did need some alterations, the neck was a little too tight, needed some extra buttons to secure the dress, and needed to be bustled so I could walk! But for such a gorgeous dress, I did not mind! My alterations for this dress came out to $90.
So my Chinese dress in total was around $240 (I added an extra $50 for American pricing and taxes!)

My FINAL tip to you savvy wedding dress savers and shoppers is to find a GOOD TAILOR! Often brides who buy their dresses in a boutique will often get their alterations done there as well. There are 2 ways to avoid this heavy wedding markup, also known as the “wedding tax”.
First, buying a bridesmaids dress as your wedding gown will mean you only have to pay for bridesmaids alterations at the boutique, which are MUCH cheaper than bridal gown alterations.
And second (this is the one I recommend) is to find a good tailor in your city! Often it will be family run, or just a smaller business in general. There won’t be as high of a markup price since they aren’t “technically” in the wedding industry.
So I got 2 wedding dresses altered to exactly how I wanted, and looking exactly how I wanted for $640! Not too bad!
Let me know if I missed anything for my wedding dress hacks, or if you have any questions!
Happy saving!
-em
07 9 / 2017
Flamingo

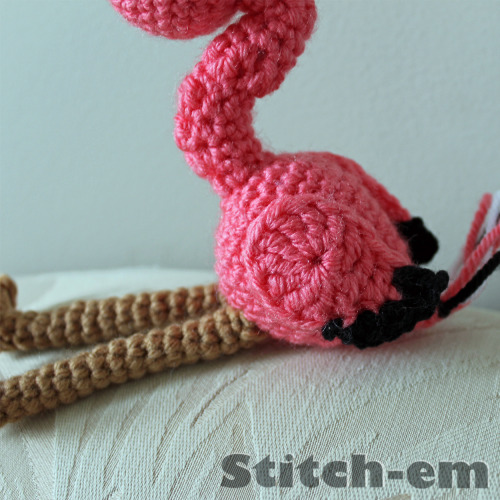
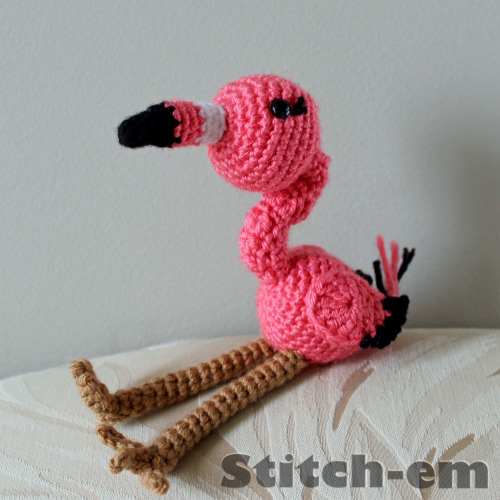
My best friend LOVES flamingos. So much that she asked for a flamingo themed birthday party. We had flamingo plates, napkins, decorations, balloons, and my one friend even cut out construction paper flamingos to decorate the house! So I knew I had to create a little flamingo to celebrate!
I have to say it was pretty daunting creating the neck of a flamingo. I googled a LOT of pictures. I have concluded that their necks are long and elegant, and was quite hard to recreate with yarn. But I think I did a decent job!

Materials:
- 3.5mm hook
- pink, black, white, and light brown medium weight yarn
- 9mm safety eyes
- polyfill
-yarn needle
Learn to change colours HERE and to fasten off HERE
Abbreviations:
ch - chain
sc - single crochet
hdc - half double crochet
dc - double crochet
tr - treble crochet
st - stitch
sts- stitches
inc - increase
sl st - slip stitch
Body:
In pink
1) ch 2. 6sc in the first chain (6)
2) inc around (12)
3) *inc, 1sc* around (18)
4) *inc, 2sc* around (24)
5) *inc, 3sc* around (30)
Rows 6-10) 1sc in each stitch (30)
11) *sc dec, 3sc* around (24)
12) 1sc around (24)
13) *sc dec, 2sc* around (18)
14) 1sc around (18)
15) sc dec around (12)
16) 1sc around (12) Stuff
17) sc dec around (6)
18) 1sc in next 2sts, sl st in next st. FO, and leave a small tail (for the flamingo’s tail later)
Neck:
In pink
1) ch 8. Sl st into the first chain. 1sc in each ch (8)
2) 1sc around (8)
3) 1dc in next 3sts, 1sc in the next 4sts (8)
4) 1dc in the next 3sts, 1sc in the next 5sts (8)
5) 1dc in the next 3 sts, 1sc in the next 3sts, 1sl st in the next 2sts (8)
6) 1sc in the next 5sts, 1sl st in the next 3sts (8)
7) 1dc in the next 3sts, 1sc in the next 2sts, 1dc in the next 3sts (8)
8) 1sc round (8)
9) 1sc around (8)
10) 1sc, 1sl st in teh next 4sts, 1sc, 1dc in the next 2sts
11) 1dc, 1sc, 1sl st in the next 3sts, 1sc, 1dc in the next 2 sts (8)
12) 1dc, 1sc in the next 7sts, 1 sl st in the last st. (8) Fasten off and leave a tail for sewing

Head:
In pink
1) ch 2. 6sc in the first chain (6)
2) inc around (12)
3) *inc, 1sc* around (18)
4) *inc, 2sc* around (24)
5) *inc, 3sc* around (30)
Rows 6-10) 1sc in each stitch (30) Put safety eyes between rows 6-7
11) *sc dec, 3sc* around (24)
12) *sc dec, 2sc* around (18) Stuff
13) sc dec around (12)
14) *1sc, skip 1st* x2, 1sl st. Fasten off. Leave a small tail.
With black yarn, sew 2 small “eyelashes” above each eye.
Beak:
In black
1) ch 2. 3sc in the first chain (3)
2) inc around (6)
3) 1sc around (6)
4) 1sc around
5) *inc, 1sc* around (9) change to pink
Rows 6-8) 1sc around (9) change to white
Rows 9-11) 1sc around (9) Fasten off and leave a tail for sewing
Leg: make 2
In light brown
1) ch 2. 5sc in the first chain. (5)
Rows 2-17) 1sc around (5) Fasten off and leave a tail for sewing
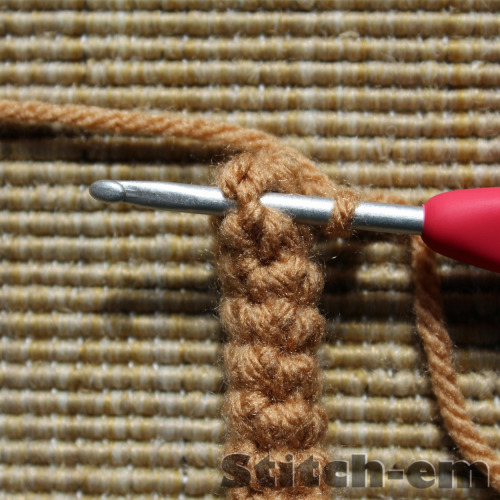
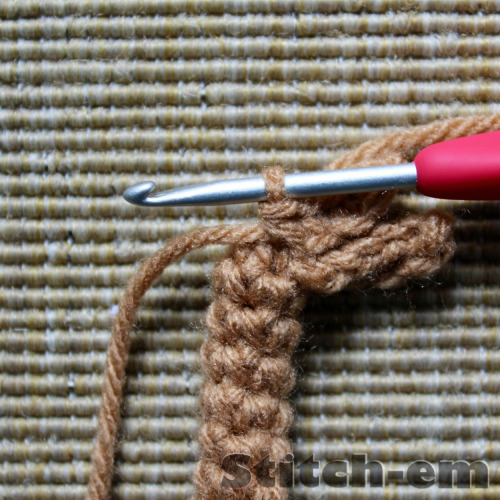
Feet:
Please follow the picture tutorial to help follow along with the instructions.
Step 1: Start with a chain on a 3.5mm hook

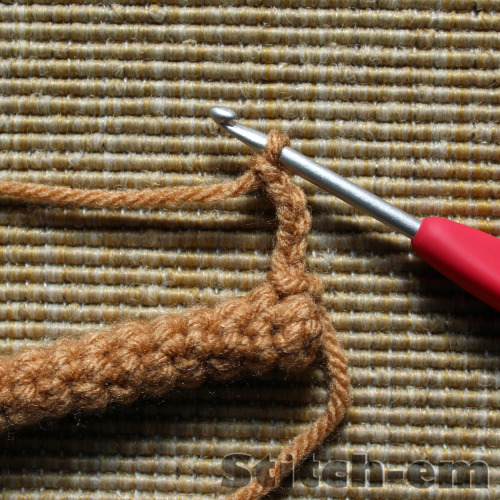
Step 2: Insert the hook into the second last row of the leg. Slip stitch to secure it.
Step 3: Chain 5
Step 4: Starting in the second chain from the hook, 1sc in each chain (4)
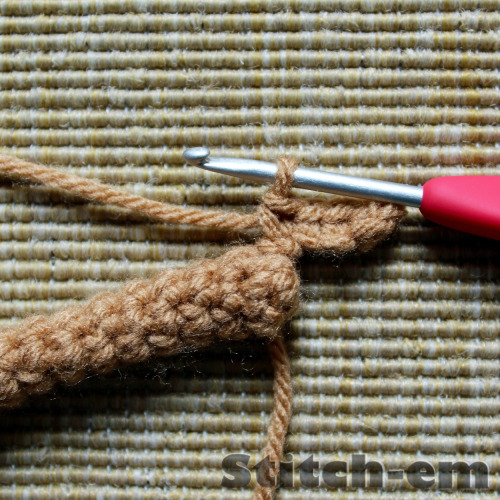
Step 5: Slip stitch into the first stitch (where your first slip stitch was.

Step 6: Chain 5.

Step 7: Starting in the second chain from the hook, 1sc in each chain (4)
Step 8: Slip stitch in the stitch beside the “first foot”. This slip stitch should be in the second last row of the leg.
Step 9: Chain 5. Starting in the second chain from the hook, 1sc in each chain (4) Slip stitch beside the last slip stitch was made.
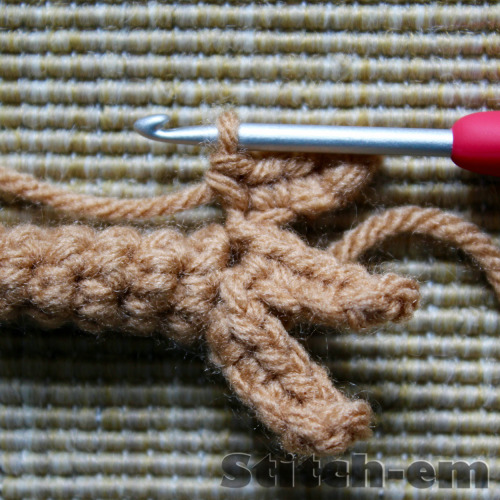
Step 10: Fasten off and weave in the end.

Wing: make 2
In pink
1) ch 6. Starting in the second ch from the hook, 1dc, 1dc, in the last chain 9tr. Now working on the opposite side of the foundation chain, 1dc, 1hdc, sl st into the first stitch. Fasten off.
To make the LEFT WING
In black
1. Sl st into the last hdc. Ch 1, 1sc, 2sc, 2dc. Fasten off. Weave in the ends
To make the RIGHT WING
In black
1. Sl st into the last hdc. Ch 2, 2dc, 2sc, 1sc, 1sl st. Fasten off. Weave in the ends.
To finish, sew all body parts to their respective spots. For extra finishing details I added black, white, and pink yarn to create a tail. I did this just by taking small pieces of yarn, and tying them to the tail end of the body.
Happy crocheting!
Please use this pattern for personal use only. Do not claim this pattern as your own or sell items made from this pattern. If you want to share this pattern, link it to Stitch-em. Do not reprint this pattern on your website. Thanks!
16 8 / 2017
Stitch-em Reboot.

I love Stitch-em. I love my blog, I love the followers, and I love the creative outlet I have. I love it when followers show me and send me pictures of their creations from a pattern I designed. I love when people ask questions and want to interact with me.
Which is why today I was devastated to see at a local art show I saw some of my work being sold for profit, without giving credit to me, or even letting me know they were selling items from my pattern. It made me so sad because on every original pattern I always state “Please use this pattern for personal use only. Do not claim this pattern as your own or sell items made from this pattern. If you want to share this pattern, link it to Stitch-em. Do not reprint this pattern on your website. Thanks!”. I was hoping everyone who came to my website was honest, and respected me as a designer to follow my wishes.
I have been asked before why I post my patterns for free on my blog. I have always wanted to share my patterns for free because it was through free online patterns I learned how to crochet. When I started to design my own, I wanted to give back to the crochet community and help others learning to crochet (which is why I also share tutorials on my blog). So whoever uses my patterns, thank-you. I hope the instructions are clear, and you love the product you make. Thank-you so much for stopping by at my blog, say hello! I would love to chat with you. I have worked hard to develop patterns, be interactive, and have magazine features. Do not abuse my hard work. Please give credit where credit is due.
(The above part was what I posted on my Instagram and Facebook accounts).
But I will continue to ramble on here about my thoughts and where I have been!
I am forever grateful for the followers I have. However you found me, thank-you. I am sorry I have been away for some time. I have been very busy! I know, it’s a pretty lame excuse. But I have been. I was accepted into a master’s degree program, and it is time consuming! It is very tough work, and there are always so many papers to write, that when I want to relax, I find myself sleeping instead of picking up a crochet hook. I do miss crocheting a lot! And I have a list of ideas and half finished products that I need to work on.
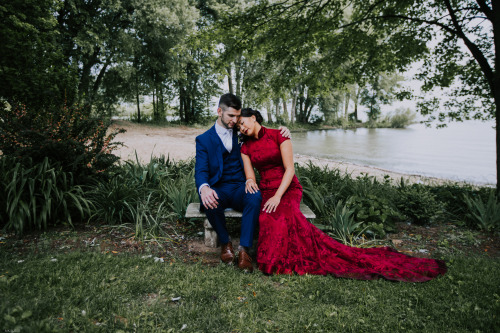
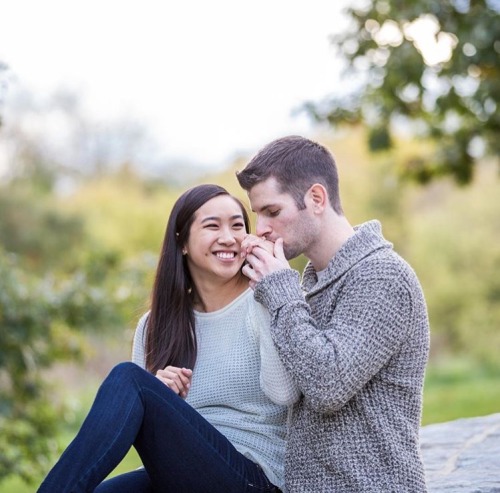
Another life update, Martin (the picture editing and camera guy for Stitch-em) and I got engaged. Last year. Sorry. I never updated you guys on that here. Sorry! For the past little bit I have been planning a wedding! Which will happen next June. I can post about my wedding journey on here if you guys want. Martin and I did do some DIY wedding things which I can share, but I will not overboard on that. I do want to keep this blog mainly crochet! But here’s a photo from our engagement photoshoot! Don’t let the sunshine deceive you. I was freezing!!! Why are girls sweaters so thin?
I just want to thank-you all for being supportive, even when I do not post a lot on this blog. Like I said before, you can keep up with me on my other social media. BUT do not forget my TRUE LOVE will always be this blog. I hope to post again soon, and talk to you all even sooner. Thank-you again.
Happy crocheting!
-em
01 9 / 2016
Polaroid Picture Frame
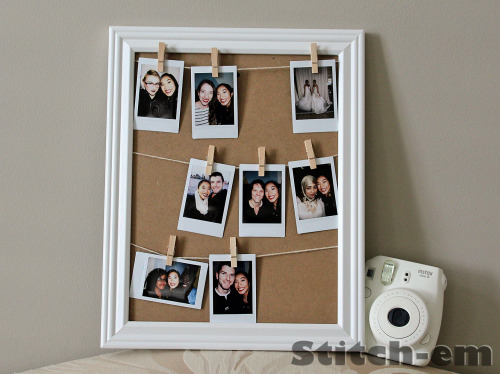
I LOVE my Instax mini 8 camera. I love the idea of having memories that are only for me and the people that I choose share it with because there is only one copy of the photo. Unlike digital cameras where you can share the pictures with everyone online.
The trouble with these photos is that I end up having stacks of amazing memories but I don’t know how to show them off. I was wandering around the mecca of craft stores (yes, Michaels) and saw this white picture frame. And I got the idea of hanging pictures up, instead of trying to jigsaw them into a traditional frame. Keep scrolling if you want to find out how I made this hanging picture frame!

Materials:
- 8 x 10inch frame
- little clothespins
- string
- tape
- your favourite polaroid photos!

Remove the frame and glass. Take the backing of the frame to begin this project.
Cut 3 pieces of string long enough to go across the width of the frame. Cut about 5cm extra so you have enough string to secure it to the back.
Secure the string to the back of the frame with tape. Organize your photos to your liking and secure them onto the string with the clothespins.

I had to adjust the strings a few time to get the right looseness so the pictures could hang nicely. When you are happy with the photo placement, put the backing back into the frame (but not with the glass).

That’s it! I like how I can easily switch out my photos without too much hassle.
Happy crafting! (new crochet project coming soon, I promise!!!)
06 6 / 2016
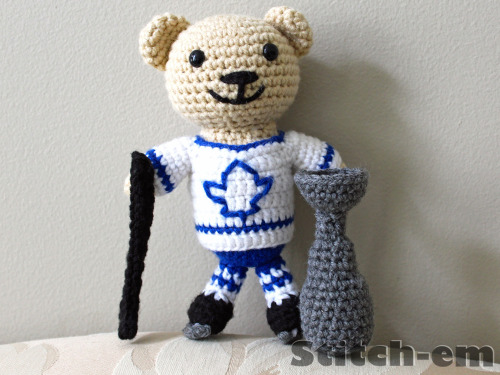
Stanley Cup

In a few short days, the Sharks or the Penguins will take home the Stanley Cup!! Martin (my boyfriend.. check out ABOUT ME) never liked Crosby (Crybaby), but since I’m from Nova Scotia…I hope the Penguins win!
I made this little Stanley cup for the HOCKEY BEAR I made Martin a little while ago! Keep scrolling for the free pattern!
Materials:
- 3.5mm hook
- grey yarn
- yarn needle
- stuffing (poly fill)
Base: worked in rounds
1) ch 2. 6sc in the first chain (6)
2) inc around (12)
3) *inc, 1sc* around (18)
4) Back loops only: 1sc around (18)
Rounds 5-10) 1sc around (18)
11) *sc dec, 1sc* around (12)
Rounds12-14) 1sc around (12)
15) sc dec around (6)
Rounds 16-17) 1sc around (12) Fasten off and leave a tail for sewing
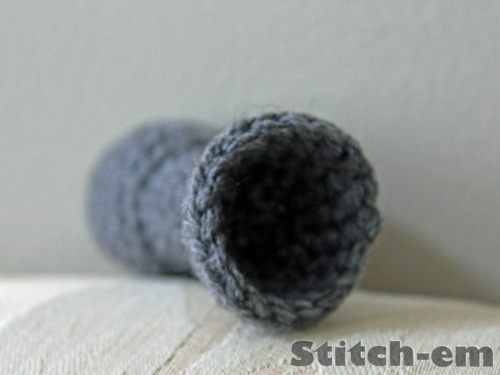
Cup: worked in rounds
1) ch 2. 6sc in the first chain (6)
2) inc around (12)
3) *inc, 1sc* around (18)
Rounds 4-5) 1sc around (18) Fasten off and weave in the ends
Finishing:
Stuff the base firmly to give it shape. Sew the cup on the top of the base to complete the cup.
Martin believes that the Maples Leafs will one day win. I think that will happen too one day, but in like 50 years! Maybe one day a Leafs player can actually stand by the REAL Stanley Cup! Haha!
Looking for more hockey inspired patterns? Check out my HOCKEY SKATE ORNAMENT and my HOCKEY SKATE BABY SHOES patterns.
Happy crocheting!
Please use this pattern for personal use only. Do not claim this pattern as your own or sell items made from this pattern. If you want to share this pattern, link it to Stitch-em. Do not reprint this pattern on your website. Thanks!